
Finding solitude in Banff during July isn’t about discovering a secret spot; it’s about mastering the preparation and mindset that unlock tranquility anywhere.
- Physical conditioning for high-altitude trails is the first filter that separates you from the crowds.
- True peace of mind comes from having the right gear and safety knowledge, allowing you to embrace the wild instead of fearing it.
- Strategic planning, from transit choices to reservation “hacks,” opens up protected areas inaccessible to the average tourist.
Recommendation: Shift your focus from finding an empty place to creating a personal experience of solitude through deliberate, mindful preparation.
You’ve escaped the gridlock on the Gardiner Expressway or Vancouver’s Lions Gate Bridge, dreaming of the vast, silent landscapes of the Canadian Rockies. But you arrive in Banff in July only to find a different kind of traffic jam: a line of cars for a parking spot at Lake Louise, a crowd of selfie-sticks on the shore of Moraine Lake, and a bustling trail that feels more like a city sidewalk. The silence you craved is drowned out by the chatter of a thousand other visitors seeking the exact same thing.
Most guides will tell you the obvious: go early, stay late, or visit a “lesser-known” spot that has long since become popular. These are surface-level fixes for a deeper problem. For the stressed executive from Toronto or Vancouver, true mental wellness in nature isn’t just about avoiding people; it’s about reconnecting with a sense of profound quiet and self-reliance. This requires more than a different itinerary; it requires a different mindset.
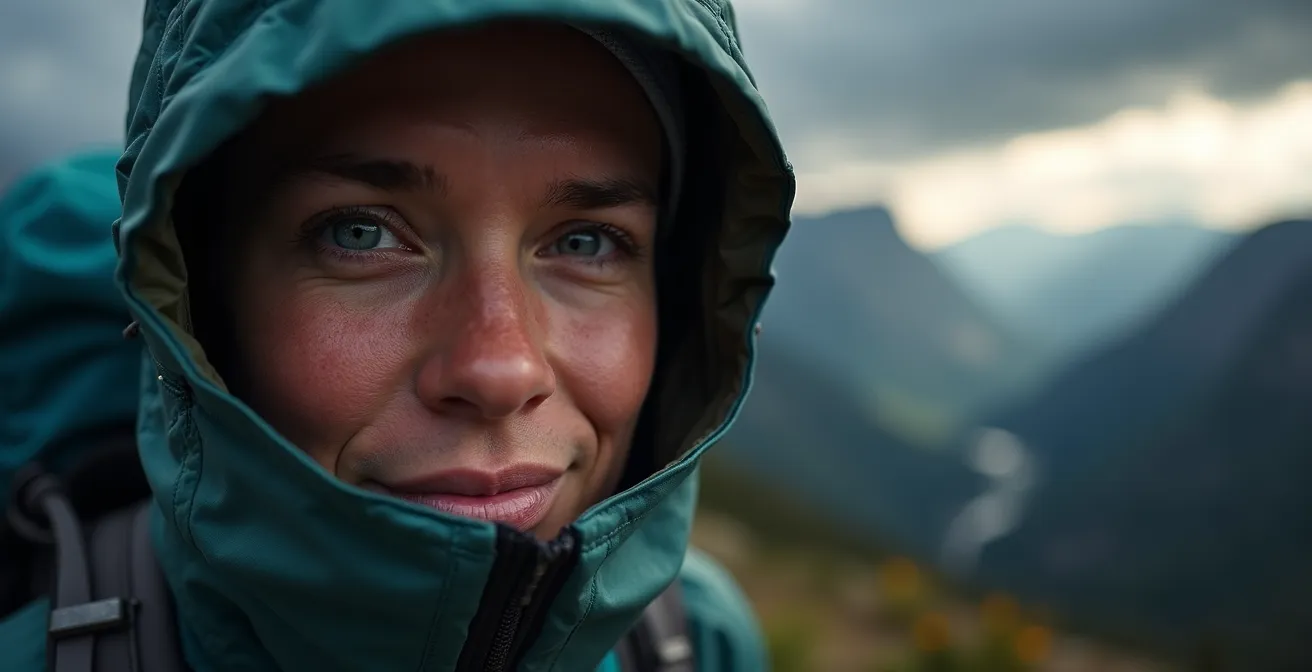
The truth I’ve learned over 20 years of guiding in these mountains is that solitude is not a location you find, but a state of mind you cultivate through deliberate preparation. It’s earned, not discovered. It’s in understanding that your gym routine won’t prepare you for the thin air at 2,000 meters, that your choice of jacket is a mental tool, and that knowing how to use bear spray isn’t just about safety—it’s about silencing the fear that pollutes your peace. This guide is built on that principle. We will explore how to prepare your body, your gear, and your strategy to truly experience the Rockies away from the crowds, even at the height of summer.
This article provides a complete framework for finding that coveted solitude. We’ll cover everything from physical and gear preparation to advanced strategies for accessing the most protected—and therefore quietest—parts of the park. The following summary outlines the key areas we will explore to transform your trip from a crowded tour into a genuine wilderness retreat.
Summary: A Strategic Guide to Cultivating Solitude in the Rockies
- Why Your Gym Routine Isn’t Enough for a 2,000m Elevation Hike?
- Hard Shell vs. Soft Shell: Which Jacket Survives a Sudden Jasper Storm?
- The Bear Spray Mistake That Could Cost Your Life on a Solo Hike
- How to Plan a 3-Day Rockies Meditation Retreat for Under $600 CAD?
- When to Capture the Perfect Sunrise at Moraine Lake to Avoid the Influencers?
- GPS vs. Paper Map: Why You Still Need a Compass in Algonquin Park?
- Green Key vs. LEED: Which Hotel Certification Actually Saves Energy?
- How to Hack the Parks Canada Reservation System to Get a Spot at Lake O’Hara?
Why Your Gym Routine Isn’t Enough for a 2,000m Elevation Hike?
The first and most effective filter for crowds in the mountains is elevation. Most visitors stick to the valley floors and easily accessible viewpoints. The path to true solitude begins where the air gets thin, but your standard gym workout, focused on strength and cardio at sea level, won’t get you there. Hiking at altitude is a different biological challenge. With less oxygen, your body works harder, your heart rate increases, and your muscles fatigue faster. This is where altitude-specific conditioning becomes non-negotiable.
Think of it this way: your VO2 max—the maximum amount of oxygen your body can utilize during intense exercise—is the currency of the mountains. A high-altitude environment effectively taxes that currency. Standard training doesn’t prepare you for this deficit. In fact, specific research from Toronto’s altitude training facility shows that training at a simulated 10,000 ft can cut workout time by 50% while achieving the same fitness gains. This is why you see fit people from low-lying cities gasping for air on a moderate incline in Banff.
Case Study: The Kilimanjaro Success Story
A 65-year-old couple from Toronto trained for three months at Altitude Athletic Training before their Mount Kilimanjaro attempt. By using simulated altitude conditions up to 15,000 feet, they successfully summited without any symptoms of altitude sickness. This demonstrates that targeted, altitude-specific preparation is far more effective than general fitness for high-elevation goals. It’s a testament to the power of training not just harder, but smarter.
The key is to simulate the demands of the trail. This means incorporating weighted pack training, focusing on hill repeats (or a stair-master if you live in a flat city), and building your aerobic base with tempo runs. This preparation doesn’t just build physical resilience; it builds the confidence to leave the crowded valley trails behind and venture into the quiet alpine zones where solitude is abundant.
Your physical readiness is the first step. Without it, the most beautiful and serene locations will remain physically out of reach, forcing you to stay among the crowds you came to escape.
Hard Shell vs. Soft Shell: Which Jacket Survives a Sudden Jasper Storm?
In the Rockies, the weather is a character in itself. A bluebird morning can turn into a ferocious, wind-driven hailstorm by afternoon. Your choice of jacket isn’t just about comfort; it’s about mental fortitude. Being cold and wet is a distraction that shatters any sense of peace. Having absolute confidence in your gear means you can remain present and calm, even when the sky turns dark over the Icefields Parkway. This is the difference between retreating in panic and standing in awe of nature’s power.
The debate between a hard shell and a soft shell jacket is central to this. A hard shell is your fortress. It’s 100% waterproof and windproof, a non-negotiable shield against a sudden downpour or the biting katabatic winds coming off a glacier. Its limitation is breathability. A soft shell, conversely, is highly breathable and water-resistant. It’s ideal for high-exertion climbs on a dry day, allowing your sweat to escape so you don’t get soaked from the inside.
For a solo hiker seeking solitude in the unpredictable July weather of Banff or Jasper, the answer is often to carry both, or to choose a high-end hard shell with good ventilation zips. The mental comfort of knowing you have a bombproof layer in your pack is invaluable. It allows you to push further up a trail, knowing you are prepared for the worst. This choice is a key part of your “gear as a mindset” strategy.
The following table, based on guidance from sources like Parks Canada, breaks down the practical differences to help you make a decision based not just on weather, but on the type of experience you seek.
| Feature | Hard Shell | Soft Shell | Best For |
|---|---|---|---|
| Waterproofing | 100% waterproof | Water-resistant only | Hard shell for Icefields Parkway |
| Breathability | Limited ventilation | Excellent breathability | Soft shell for high-exertion climbs |
| Wind Protection | Complete windproof | Good wind resistance | Both effective for katabatic winds |
| Dry-Out Time | 4-6 hours | 1-2 hours | Soft shell for multi-day trips |
| Weight | 300-500g | 200-400g | Soft shell for fast-and-light |
| Mental Comfort | High confidence in storms | Comfortable for movement | Personal preference |
Ultimately, the right jacket isn’t the one that keeps you driest in a lab test, but the one that gives you the mental freedom to embrace the wild solitude of the mountains, whatever the weather.
The Bear Spray Mistake That Could Cost Your Life on a Solo Hike
Nothing shatters a meditative state faster than the snap of a twig and the sudden fear of a bear encounter. For the solo hiker, this background anxiety can poison the entire experience. The key to true mental peace in bear country is not hoping you won’t see a bear; it’s knowing with absolute certainty that you are prepared if you do. This is why understanding bear spray is not just a safety tip—it’s a prerequisite for tranquility.
The most common and dangerous mistake is treating bear spray as a talisman. Many hikers buy a can, toss it in their backpack, and assume they are safe. The reality is that a can of bear spray at the bottom of your pack is as useless as not having it at all. It must be immediately accessible, typically in a chest or hip holster. You will have only seconds to react in a surprise encounter. Fumbling with backpack zippers is not an option.
As Parks Canada states in their official guidelines, preparation is everything. This expert advice should be treated as gospel for anyone venturing beyond the townsite.
Always carry bear spray, ensure it is accessible, and know how to use it. Bear spray is available at the Banff visitor centres and retail outlets in Banff and Lake Louise.
– Parks Canada, Banff National Park Hiking Safety Guidelines
Beyond accessibility, proactive safety measures are your best defense. For someone seeking silence, this can feel counter-intuitive, but it is essential: make noise. A quiet hiker is a surprising hiker, and surprising a bear is the most dangerous scenario. Talk to yourself, sing, or periodically call out “Hey, bear!” This alerts wildlife to your presence, giving them ample time to move away. Remember, bears are not malicious; they are simply defending their space, their young, or a food source. Respecting that is your primary responsibility.
- Make noise continuously: Being quiet puts you at higher risk for sudden wildlife encounters. Use your voice.
- Stay alert: Pay extra attention in shrubby areas, near running water, and when approaching blind corners where visibility is low.
- Back away slowly: If you do encounter wildlife, never turn your back. Keep the animal in sight and slowly create distance.
- Never run: Running can trigger a predatory chase response in many animals, including bears and cougars.
- Secure attractants: Store all food, garbage, and scented items (like toothpaste) in designated bear-resistant containers or lockers.
- Report encounters: Inform Parks Canada of any aggressive or unusual animal behavior to help keep others safe.
By mastering these safety practices, you replace fear with respect and preparedness. This mental shift is what allows you to finally relax and immerse yourself in the profound silence of the Rockies.
How to Plan a 3-Day Rockies Meditation Retreat for Under $600 CAD?
A meaningful retreat for mental wellness doesn’t require an expensive lodge or a guided tour. In fact, crafting your own budget-friendly, solitary experience can be far more rewarding. The key is to leverage local infrastructure and plan your days around sensory experiences rather than ticking off a list of famous locations. With a bit of strategic planning, a transformative 3-day meditation retreat in the Rockies is achievable for under $600 CAD.
First, ditch the rental car. The stress of finding parking and contributing to congestion is antithetical to a meditative mindset. Instead, embrace the local Roam Public Transit system. It’s efficient, affordable, and forces a slower, more deliberate pace. More importantly, it provides access to dozens of world-class trailheads, including quiet gems that are often overlooked by the car-bound masses.
Case Study: The Car-Free Backcountry Access Strategy
By using Banff’s Roam Public Transit, hikers can access a vast network of trails without a vehicle. Route 6 leads to the serene shores of Johnson Lake, a perfect spot for quiet reflection. Route 4 accesses the trails around the Cave and Basin area. Furthermore, the free Sunshine Village shuttle opens up incredible backcountry options like Egypt Lake. Combining a Roam pass with stays at budget-friendly options like the HI Mosquito Creek Hostel makes a car-free retreat both affordable and rich in solitary opportunities.
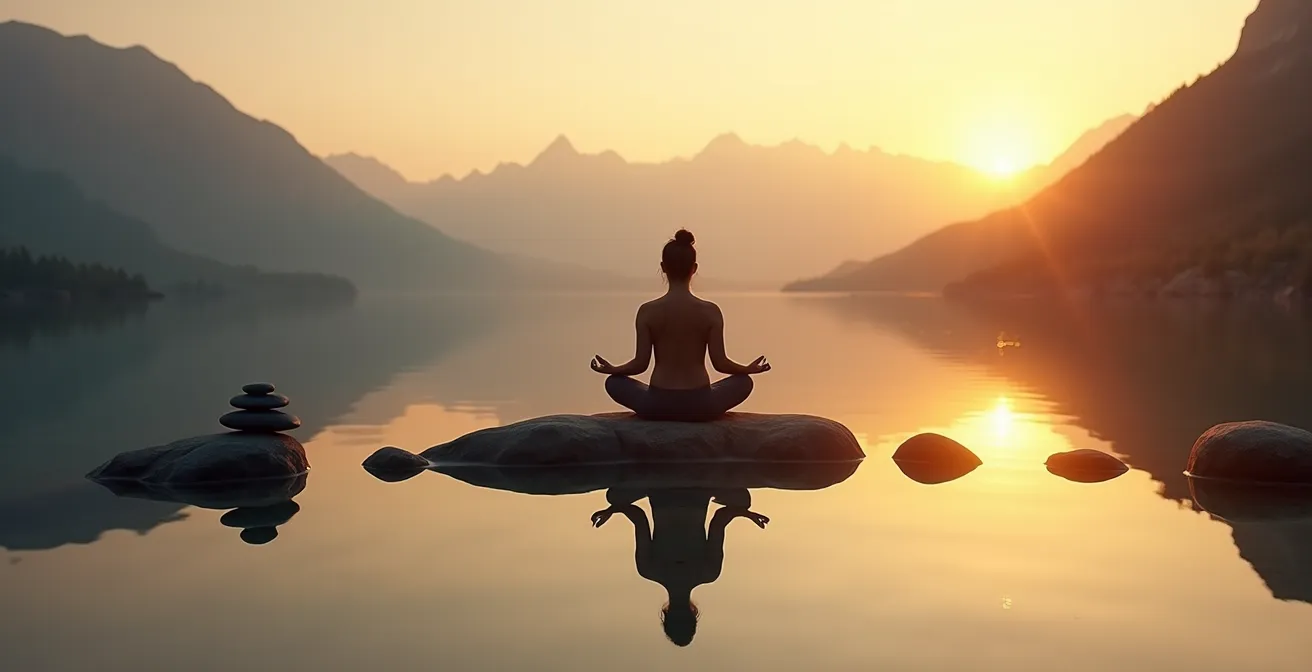
Instead of a location-based itinerary, build a sensory-based one. Dedicate each day to a different sense. This practice of “sensory focusing” is a powerful mindfulness technique that anchors you in the present moment and deepens your connection to the landscape. It transforms a simple hike into a profound meditative experience.
Your 3-Day Sensory Meditation Itinerary
- Day 1 – Sound Focus: Start at Vermillion Lakes at sunrise. Walk from Banff (free), then paddle a rented canoe for just 10 minutes from the crowded docks to find complete silence. Close your eyes and listen to the call of a loon, the gentle lapping of water, and the wind in the reeds.
- Day 2 – Sight Focus: Skip the crowded Plain of Six Glaciers trail. Instead, hike the Fairview Lookout trail for a quieter but equally stunning view of Lake Louise. Or, for a full day of sensational high-alpine views away from the masses, tackle the Helen Lake trail on the Icefields Parkway.
- Day 3 – Touch/Scent Focus: Experience the crisp, cold water of Herbert Lake while canoeing. Alternatively, take an early morning or late evening hike when the sun doesn’t set until after 10 PM in summer. Focus on the scent of pine needles after a rain shower and the feel of the cool mountain air on your skin.
- Budget Breakdown: A rough plan could be: Hostel ($35/night x 2 = $70), Roam Transit Pass ($40), Food ($150), Canoe Rental ($100). This leaves a generous buffer within the $600 budget.
- Pro Tip Integration: For even deeper solitude and better prices, plan your trip for the shoulder seasons of May or late September. The landscape is just as majestic, but the crowds are a fraction of their July peak.
By focusing on the quality of your experience rather than the quantity of sights seen, you can achieve a level of peace and solitude that money simply cannot buy.
When to Capture the Perfect Sunrise at Moraine Lake to Avoid the Influencers?
Moraine Lake at sunrise is the quintessential Rockies experience, but it has become a victim of its own fame. The iconic rockpile is often shoulder-to-shoulder with photographers and influencers long before the first light hits the Valley of the Ten Peaks. The typical advice, “get there early,” is no longer sufficient. You need a more nuanced strategy to experience the magic without the madness. The goal is not just to see the sunrise, but to feel it in a moment of genuine quiet.
The first strategy is about timing. The main rush of serious photographers arrives for the pre-dawn “blue hour” and the initial moments of alpenglow. The wave of general tourists on buses starts arriving shortly after. However, there’s a golden window between these two rushes. Many experienced photographers have discovered that the 60-minute window after sunrise sees the departure of the first wave, leaving the shoreline relatively peaceful before the main crowds descend. This is your moment for quiet contemplation.
The second, and more powerful, strategy is to change your perspective—literally. Instead of joining the throng on the rockpile, apply the principle of “seeing the landscape differently.” The most rewarding views are often found just a short distance away from the main attraction. This is where a little bit of effort pays huge dividends in solitude.
Case Study: The Larch Valley Viewpoint Strategy
Instead of battling for a spot on Moraine Lake’s famous rockpile, one can find a quieter, more elevated viewpoint by hiking just 15 minutes up the Larch Valley trail. This path offers equally stunning perspectives of the lake and peaks, but without the crowds. One photographer reported having this alternate viewpoint entirely to themselves during peak August season, while observing more than 50 people crowded onto the main rockpile below. This small investment in physical effort yielded an infinitely more peaceful and authentic experience.
This approach can be applied to almost any famous landmark in the park. Look for a short connecting trail, a small hill, or a different point along the shoreline. By consciously choosing to step away from the designated photo spot, you are not just getting a more unique photo; you are actively choosing solitude over social proof. It’s a powerful shift that transforms you from a passive tourist into an active participant in the landscape.
The best view of Moraine Lake isn’t necessarily the one on Instagram; it’s the one you have all to yourself.
GPS vs. Paper Map: Why You Still Need a Compass in Algonquin Park?
While this article focuses on the Rockies, the principle of self-reliance is universal to finding solitude in any Canadian wilderness, including the dense forests of Algonquin Park. In our hyper-connected world, it’s tempting to rely solely on a GPS or smartphone for navigation. This is a critical mistake. A dead battery, a dropped device, or a lack of satellite signal in a deep canyon can leave you dangerously lost. More importantly, staring at a screen severs your connection to the landscape you came to experience.
The reality is that technology fails. As Parks Canada officially warns that cell phone coverage is not reliable throughout its mountain parks, especially in the very canyons and remote valleys where you are most likely to find solitude. A paper map and a compass are your only truly reliable tools. But their value goes far beyond mere backup. Using them is an act of mindfulness.
Mindful navigation forces you to slow down and observe. You have to identify peaks, read contour lines, and pay attention to the direction of a river. You are no longer a blue dot moving on a screen; you are an engaged, thinking being, actively interpreting the world around you. This deep engagement is a powerful form of meditation. The rustle of your map and the click of your compass become the soundtrack to your solitude, replacing the digital chimes of a device.
Learning these skills before you go is essential. It’s not something you want to be figuring out for the first time when you’re disoriented. Practice in a local park, take a course, and build your confidence. The following skills are the foundation of true navigational independence:
- Learn Magnetic Declination: This is the angle between magnetic north (where your compass points) and true north. It’s crucial in Canada, where the variation can be significant. You must know how to adjust for it in your specific hiking area.
- Practice Triangulation: Use your map and compass together to pinpoint your exact location by taking bearings on two or three visible landmarks.
- Identify Landmarks and Backstops: Before you start, identify major features on your map (a river, a ridge, a lake) that will act as “backstops” to tell you if you’ve gone too far.
- Take Regular Bearings: Don’t wait until you’re lost. At every trail junction or major viewpoint, orient your map and confirm your location and direction of travel.
- Use it as a Mindfulness Practice: Treat every navigation check as an opportunity to pause, breathe, and connect deeply with the landscape around you.
Mastering a map and compass doesn’t just make you safer; it unlocks a deeper, more intimate relationship with the wild, which is the very essence of the solitude you seek.
Green Key vs. LEED: Which Hotel Certification Actually Saves Energy?
Your quest for mental wellness and solitude can extend to your choice of accommodation. For a stressed executive, knowing your stay aligns with your personal values of environmental stewardship can contribute to a deeper sense of peace and integrity. However, the world of “green” certifications can be confusing. Understanding the difference between major labels like Green Key and LEED allows you to make an informed choice that truly reflects your intentions.
The two certifications evaluate different aspects of a hotel’s environmental impact. Neither is inherently “better,” but they tell you different things about the property. LEED (Leadership in Energy and Environmental Design) is primarily concerned with the building itself. It’s a certification for construction and design. A LEED-certified hotel has been built or retrofitted with a focus on energy efficiency, using materials and systems like high-quality insulation, efficient windows, and smart HVAC systems to reduce its physical footprint.
Green Key, on the other hand, focuses on a hotel’s day-to-day operations. It’s an audit of practices. A hotel with a high Green Key rating excels in areas like waste reduction, water conservation, sustainable sourcing for its restaurant, and eco-friendly laundry practices. A hotel could be in an old, less-efficient building but still achieve a high Green Key rating through excellent operational management.
To make a truly conscious choice, it’s helpful to see these certifications side-by-side, along with another crucial local consideration: policies protecting wildlife.
| Certification | Focus Area | Measurement | Best For Evaluating |
|---|---|---|---|
| Green Key | Daily Operations | Waste reduction, water usage, laundry practices | Hotel’s ongoing environmental practices |
| LEED | Building Design | Insulation quality, window efficiency, HVAC systems | Physical building’s energy efficiency |
| Local Wildlife Corridor Policies | Ecosystem Protection | Lighting design, fencing, landscaping for animal movement | True local environmental stewardship |
For the traveler seeking holistic peace, choosing a hotel that is both LEED certified (efficient by design) and has a high Green Key rating (responsible in practice) represents the gold standard, ensuring your stay is as light on the land as it is restorative for the soul.
Key Takeaways
- True solitude in Banff is not found by chance; it is earned through deliberate physical, mental, and logistical preparation.
- Adopting a “mindset of solitude” means choosing effort over ease, such as learning manual navigation or hiking further for a quieter view.
- Your gear, from your jacket to your bear spray, are tools that build the mental confidence required to be at peace in the wild.
How to Hack the Parks Canada Reservation System to Get a Spot at Lake O’Hara?
There is perhaps no place in the Canadian Rockies that embodies pristine, protected solitude more than Lake O’Hara in Yoho National Park. Access is strictly controlled by a bus system to preserve its fragile alpine environment. This makes it one of the most sought-after and difficult-to-book experiences in Canada. The competitive reality shows that only 3,000 day-use bus seats are available for the entire summer season, and they are typically gone within minutes of their release in January. For most, this means the dream of visiting is over before it begins. But for the strategic planner, there are ways to “hack” the system.
The primary strategy relies on understanding that cancellations happen constantly. The key is to be ready the moment a spot opens up. Manually refreshing the Parks Canada website is a recipe for frustration. Instead, using an automated scanning service is the most effective approach.
Case Study: The CampNab Cancellation Strategy
Automated scanner apps like CampNab have proven highly effective for securing last-minute reservations. These services monitor the Parks Canada system 24/7 and send you a text or email alert the instant a cancelled spot becomes available. One user reported finding an opening for Lake O’Hara just three days before their trip date, with the alert arriving at 5 PM. This demonstrates that cancellations are released back into the system immediately, not at set times. This method has also been successful for other highly coveted spots like Mount Assiniboine, Egypt Lake, and the Rockwall Trail.
Beyond automated scanning, a multi-pronged approach increases your chances. There are several alternative pathways to securing a spot on that coveted bus, each requiring different timing and methods. Familiarizing yourself with all of them turns a game of pure luck into one of calculated strategy.
Your Multi-Pronged Lake O’Hara Access Plan
- Commercial Quotas: Licensed guide companies have their own allocation of seats. Start calling them on April 1st via the central booking number (1-250-343-6433) to book a guided trip that includes bus transport.
- ACC Hut Lottery: The Alpine Club of Canada runs a lottery to book stays at the Elizabeth Parker Hut. A successful lottery entry includes guaranteed bus transportation for your group.
- Last-Minute Releases: A significant number of seats held for commercial operators are released back to the public if they go unused. Check the reservation system exactly two days before your desired date at 8 AM local time.
- The Hiker’s Gamble (Deliberate Inefficiency): Commit to hiking the 11km access road. This guarantees you’ll get there. While tiring, the road itself is a solitary experience. Once at the lake, you can attempt to get a standby spot on a return bus, but you must be prepared to hike the 11km back out. This is the ultimate “earned solitude.”
- The Premium Option: Book a stay at the Lake O’Hara Lodge. It’s a significant financial investment, but accommodation includes guaranteed transportation and exclusive access to the area.
Your journey to the quiet shores of Lake O’Hara doesn’t start on the trail; it begins months before, with diligent planning. The effort involved is precisely what preserves the solitude that makes it so extraordinary.