The secret to avoiding pack weight fatigue isn’t a better gear list; it’s adopting a minimalist, safety-first system dictated by Canada’s unique environmental challenges.
- Generic hiking advice fails in Canada; you must plan for specific issues like glacial silt, maritime dampness, and extreme temperature swings.
- Every gram counts. Your fitness, gear choices, and safety protocols must be field-proofed to prevent system failure on the trail.
Recommendation: Before buying any gear, audit your plan against the specific terrain you will face and train your body for the unique stress of carrying a loaded pack downhill.
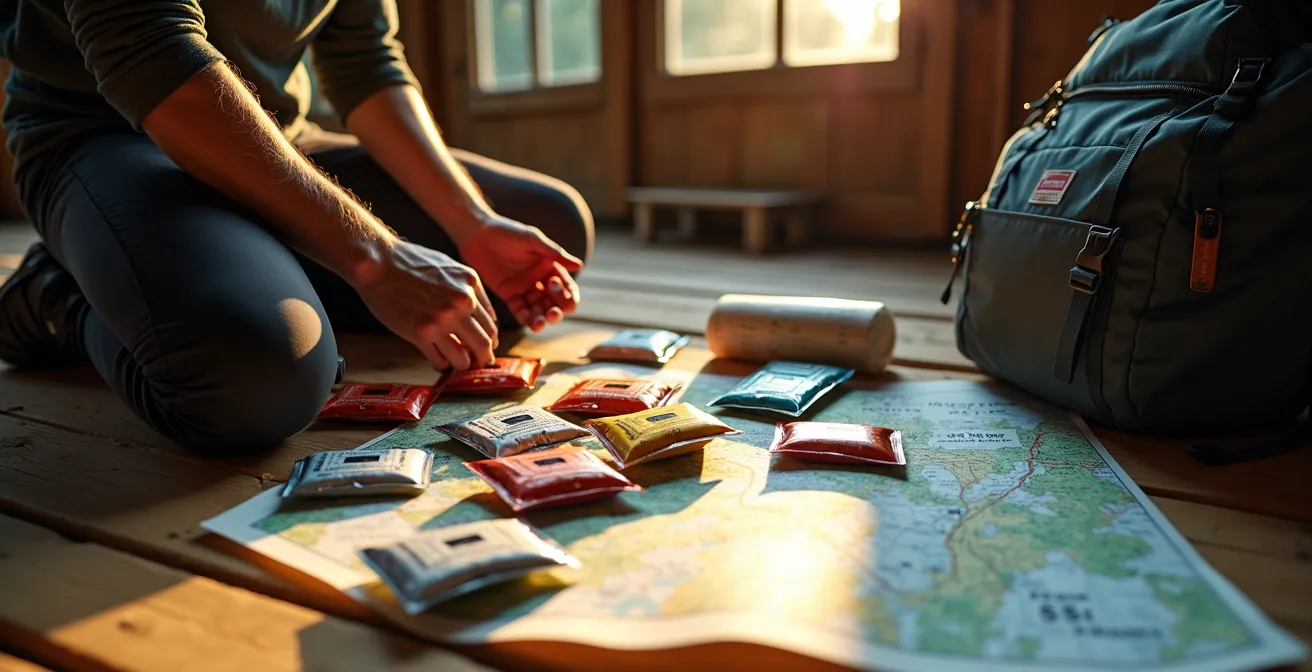
The question isn’t “How to pack food for the West Coast Trail?” The real question is how to survive the trail’s relentless assault on your body and spirit. I’ve seen countless intermediate hikers, fit and confident, get broken by the WCT. They arrive with heavy packs full of “just-in-case” items and gourmet trail meals, and they leave—if they finish at all—exhausted and defeated. The culprit is almost always the same: pack weight fatigue. It’s a vicious cycle where a heavy pack slows you down, drains your energy, and leads to poor decisions.
Most advice focuses on generic platitudes: pack high-calorie foods, bring layers, carry a filter. This advice is not wrong, but it’s dangerously incomplete for the Canadian wilderness. It fails to account for the specific environmental pressures that define a trek here, whether it’s the soul-sucking mud and ladders of the WCT, the sudden storms of the Rockies, or the navigational challenges of the Canadian Shield. Your pack should ultimately weigh no more than 25%-30% of your body weight, but achieving that isn’t about a magical packing list. It’s about a shift in mindset.
The true key to avoiding fatigue is to let the terrain dictate your choices. This is about building minimalist, redundant systems designed to anticipate and neutralize the specific failure points of the Canadian backcountry. It’s about understanding *why* a GPS battery is a liability in the cold, *why* wool is non-negotiable on the coast, and *why* your gym routine won’t prepare you for a 2,000-metre descent. This isn’t just about packing food; it’s about a complete philosophy of movement and survival in one of the world’s most beautiful and unforgiving landscapes.
This guide moves beyond generic checklists. We will dissect the specific environmental challenges you’ll face on a Canadian multi-day trek and provide the field-tested systems required to overcome them. Each section addresses a critical question that every intermediate hiker must answer before setting foot on the trail.
Summary: A Systematic Approach to Canadian Backcountry Safety
- The “Poop Tube” Protocol: How to Handle Human Waste on Rock-Only Trails?
- GPS vs. Paper Map: Why You Still Need a Compass in Algonquin Park?
- The Two-Sock System That Saves Your Feet on a 20km Day Hike?
- Filter or Tabs: Which Water Purification Method Works Best in Glacial Streams?
- How to Choose a Tent Site That Won’t Flood During a Sudden Storm?
- Why Your Gym Routine Isn’t Enough for a 2,000m Elevation Hike?
- Why You Need Wool, Not Cotton, for a Trip to Sable Island?
- How to Photograph Moose in Algonquin Park Without Endangering Yourself?
The “Poop Tube” Protocol: How to Handle Human Waste on Rock-Only Trails?
Before we even talk about gear, we must address the first principle of backcountry travel: Leave No Trace. On many popular Canadian routes, especially coastal trails or alpine areas with thin soil over solid rock, burying human waste is impossible and irresponsible. This isn’t just an environmental issue; it’s a public health one. The solution is the “poop tube,” a non-negotiable piece of gear for any responsible trekker in these sensitive zones.
A poop tube is a simple, robust, and completely odour-proof container for packing out solid human waste. While it may sound unpleasant, it’s a mark of an experienced and respectful hiker. Using one is a straightforward system that protects fragile ecosystems from contamination. Forgetting this system is not an option. Here’s a practical guide to building your own.
DIY Poop Tube Construction Guide for the Canadian Backcountry:
- Procure Materials: Purchase a 4-inch diameter PVC pipe (approximately 12-18 inches long) from a Canadian hardware store like Home Hardware or Canadian Tire. You’ll also need one permanent end cap and one threaded cap with a rubber gasket to ensure an odor-proof seal.
- Assemble the Tube: Using PVC cement, apply a liberal amount to permanently attach the non-threaded end cap. This creates a permanent, leak-proof bottom.
- Create a Carry System: Use duct tape and paracord to fashion a simple harness or loop system. This allows you to securely strap the tube to the outside of your pack, keeping it separate from your other gear.
- Pack Collection Liners: Pack coffee filters or small paper bags. These are used to collect the waste before depositing it into the tube, which keeps the inside of the tube relatively clean and simplifies disposal.
- Proper Disposal: After your trek, the contents of the tube must be disposed of exclusively in approved toilet facilities, such as outhouses or flush toilets at trailheads or designated service areas. Never empty it in a garbage can.
This simple piece of equipment embodies the entire philosophy of minimalist, high-impact preparation. It solves a critical environmental problem with a simple, fail-proof system.
GPS vs. Paper Map: Why You Still Need a Compass in Algonquin Park?
In the dense, rolling forests of Algonquin Park, where trails can be faint and the landscape disorienting, relying solely on a GPS device is a rookie mistake. I’ve seen it happen: a battery dies in the cold, a screen shatters in a fall, or dense canopy blocks the signal, and suddenly a hiker is lost. Technology is a tool, not a replacement for skill. A map and compass are your primary navigation system; a GPS is a convenient backup.
The fundamental problem with electronic devices is their multiple failure points, especially in the harsh Canadian climate. Batteries are notoriously unreliable in freezing temperatures, and screens are fragile. A paper map and a quality compass, on the other hand, are nearly indestructible. Learning to use them is not an archaic skill; it’s a fundamental component of your safety system. It forces you to engage with the terrain, read contour lines, and maintain constant situational awareness in a way that following a dot on a screen never will.
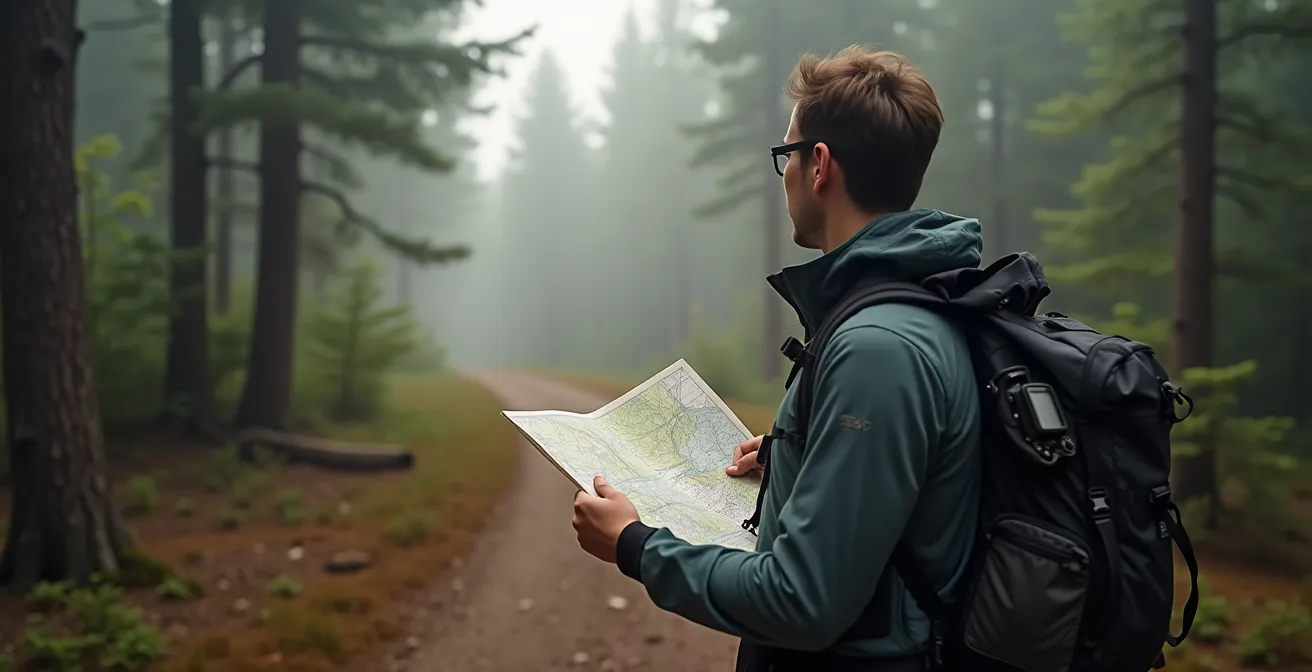
The image above captures the essence of a resilient navigation system. The GPS is present but secondary. The primary tools—the map and compass—are in hand, actively being used to make a decision. This demonstrates a core principle: your most critical systems should have zero electronic failure points. The performance degradation of electronics in cold, a common scenario in much of Canada, is not a risk worth taking.
This isn’t an argument against technology, but a case for proper redundancy. A comparative analysis of device performance in typical Canadian shoulder-season conditions reveals a stark reality. A dedicated GPS unit will far outperform a smartphone, but even it has limits that a simple compass does not.
| Device | Battery Life at -10°F (-23°C) | Signal Acquisition | Performance Impact |
|---|---|---|---|
| Garmin GPSMAP 67i | 165 hours (4+ days) | 8 seconds in dense forest | No performance degradation |
| iPhone 14 | 4 hours | Variable/slower | Significant battery drain |
| Garmin InReach Mini 2 | 90+ hours | 30-90 seconds | Minimal impact |
Trusting your life to a battery is a gamble. Trusting it to your own skill and a tool that has worked for centuries is a plan.
The Two-Sock System That Saves Your Feet on a 20km Day Hike?
Foot care is not a luxury in the backcountry; it’s the foundation of your ability to move. Blisters, maceration from moisture, and cold injuries can end a trip faster than almost anything else. The most common mistake I see is hikers relying on a single pair of thick, “cushioned” socks. This approach is flawed, especially in perpetually damp environments like the BC coast or the bogs of the Canadian Shield. The secret to happy feet is a dynamic two-sock system: a thin, synthetic or merino wool liner sock worn under a thicker, wool outer sock.
This system works by managing friction and moisture. The liner sock wicks sweat away from your skin, transferring it to the outer sock. Crucially, any friction that occurs happens between the two layers of sock, not between the sock and your skin. This single change dramatically reduces the likelihood of hotspots and blisters. Furthermore, it gives you strategic options. If your feet get soaked during a creek crossing, you can swap out the lightweight, quick-drying liners for a fresh pair, put the damp outer socks back on, and keep moving. Your skin stays drier and warmer.
This isn’t just about comfort; it’s about managing weight and energy. A wet sock is dead weight, and the cumulative effect of carrying water-logged gear is a significant contributor to fatigue.
Case Study: The Real Weight Penalty of Wet Socks
A practical field test on the West Coast Trail revealed the true weight penalty of wet gear. A single pair of thick wool socks absorbed up to 200ml of water when crossing coastal bogs, adding 200 grams of dead weight to a hiker’s feet. In contrast, carrying a spare 30-gram liner sock allows hikers to swap out the wet inner layer while the outer sock continues to provide cushioning. A study of hikers confirmed that over a 7-day trek, this system prevents the cumulative fatigue from carrying water-logged footwear.
Invest in at least two pairs of liner socks and two pairs of outer wool socks. The small investment in weight and cost pays massive dividends in comfort, safety, and your ability to complete your objective.
Filter or Tabs: Which Water Purification Method Works Best in Glacial Streams?
The turquoise water of a glacial stream in the Rockies looks pure, but it’s a minefield for water filters. While it may be free of biological contaminants at the source, it’s loaded with “glacial flour”—fine, abrasive rock sediment that will clog most hollow-fibre filters in minutes. This is a classic example of where generic advice (“always filter your water”) can lead to system failure. In glacial terrain, your purification method must account for heavy sediment.
Relying on a single Sawyer Squeeze or Katadyn BeFree is a recipe for disaster. The sediment load is so high that hikers have reported having to backflush every 4-5 liters or so just to maintain a viable flow rate. This is impractical and wastes precious time and energy. Chemical purification tabs (like Aquatabs or Pristine) are a necessary backup, as they are unaffected by silt. However, they don’t remove the sediment, leaving you with gritty-tasting water and they take time to work.
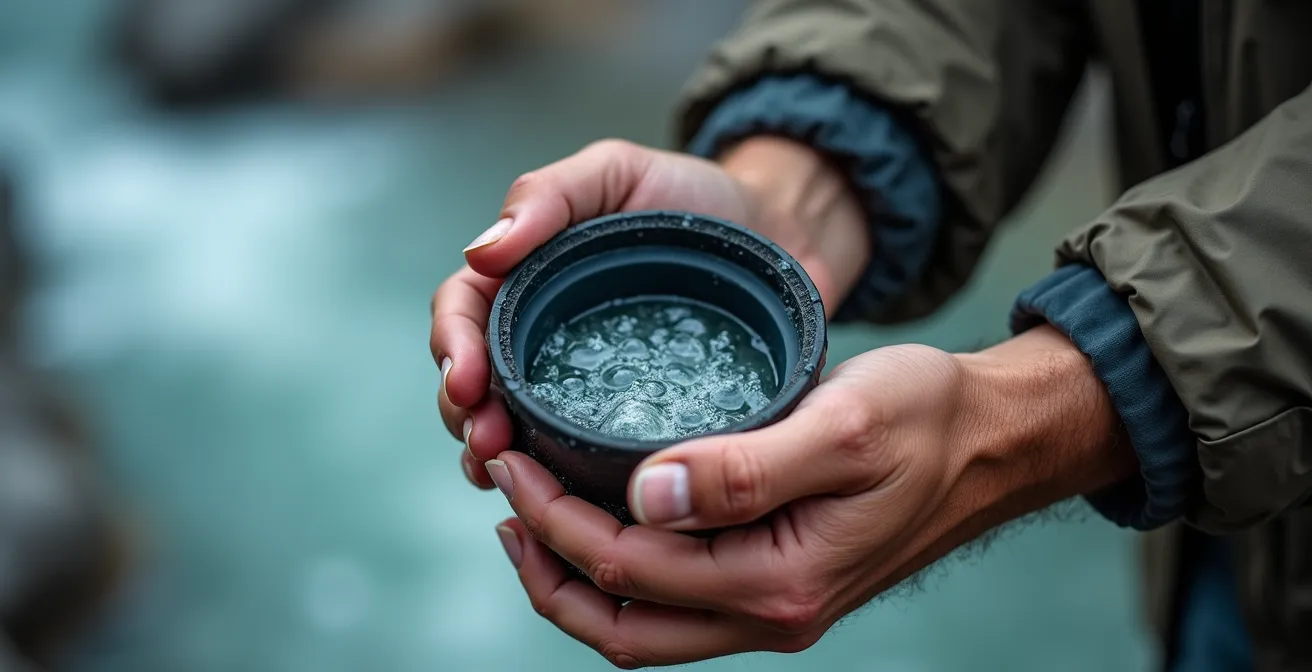
The expert solution is a two-stage approach that pre-filters the water before it ever touches your main filter. This system-based thinking protects your primary tool and ensures you have a reliable source of clean water.
Two-Stage Pre-Filter System for Glacial Streams:
- Initial Strain: Use a clean bandana or a coffee filter stretched over your collection bottle or bag to strain out the largest sediment particles as you collect water from the stream.
- Settling: If you have time (e.g., at camp), let the collected water sit undisturbed in a container for 15-30 minutes. Much of the heavier silt will settle to the bottom.
- Coagulation (Advanced): For extremely silty water, add a tiny pinch of alum powder (available in the spice aisle of most grocery stores). This acts as a flocculant, causing the fine particles to clump together and settle out much faster.
- Careful Decanting: Carefully pour the clearer water from the top of your container into your filter system, leaving the sludge of sediment at the bottom.
- Redundancy: Always carry purification tablets as a non-negotiable backup. If your filter fails completely, they are your lifeline.
This isn’t about one method being “better” than another. It’s about building a resilient, multi-layered system that is adapted to the specific challenges of the environment.
How to Choose a Tent Site That Won’t Flood During a Sudden Storm?
Choosing a campsite is one of the most critical decisions you’ll make each day. A poor choice can lead to a sleepless night, wet gear, or in extreme cases, a dangerous situation. In the varied Canadian terrain, the primary threats are water and wind. Your site selection process must be a deliberate terrain assessment, not just a search for the flattest spot. The goal is to find a durable surface on high ground with a natural windbreak.
Look for subtle clues in the landscape. In the coastal rainforests of British Columbia, the presence of skunk cabbage is a red flag, indicating a boggy area that will saturate in the rain. On the granite of the Canadian Shield, look for subtle depressions and water stains on the rock that show you where water naturally channels during a downpour. Avoid camping in the bottom of narrow valleys or draws, especially in the mountains, as they can become funnels for flash floods from sudden storms. The ideal site is often a slightly elevated, gently sloped area on mineral soil, sand, or smooth rock that allows water to drain away.
Balancing the need for drainage with the need for wind protection is key, particularly when camping near the treeline in the Rockies or the Chic-Chocs of Québec.
Case Study: Balancing Wind and Water at the Treeline
Experienced guides in exposed treeline zones recommend the “triangle rule” for site selection. Position your tent to form a triangle with two natural windbreaks, such as large boulders or a patch of resilient krummholz (stunted trees). This blocks the wind from the most likely directions while leaving you clear escape routes. A critical part of this rule is to avoid camping directly under standing dead trees, known as “widow-makers,” which are common in beetle-kill zones and can fall in high winds. The ideal site uses these terrain features for protection while remaining on a durable, well-drained surface.
To systematize your site selection, use a mental checklist every time you stop for the night.
Canadian Terrain Drainage Assessment Checklist:
- Vegetation Check: Is there water-loving vegetation like skunk cabbage (BC coast) or cattails? If so, the ground is saturated.
- High Ground: Is the site at least 3 meters in elevation above the nearest creek or shoreline? Look for previous water marks on trees and rocks.
- Subtle Depressions: Are you in a slight bowl or channel, even on what looks like flat ground? Imagine where rain would pool.
- Ground Firmness: Does your boot heel leave a water-filled depression when you press down? The water table is too high.
- Overhead Hazards: Are there any dead trees or large, unstable-looking branches overhead?
Never underestimate the power of a sudden storm. A few minutes of careful observation before you set up can save you hours of discomfort and risk.
Why Your Gym Routine Isn’t Enough for a 2,000m Elevation Hike?
Being “gym fit” is not the same as being “mountain fit.” The controlled, concentric movements of a typical gym workout—lifting weights, running on a treadmill, using an elliptical—do not prepare your body for the most damaging force you’ll encounter on a big hike: eccentric muscle contractions. This is the force your muscles, particularly your quads and glutes, must absorb when you are hiking downhill with a loaded pack. It is the primary cause of debilitating next-day muscle soreness (DOMS) and can lead to instability and injury.
A 2,000-metre elevation gain means you also have a 2,000-metre descent. This descent is what destroys unprepared hikers. Your training must specifically mimic this stress. This means incorporating weighted pack training and specific eccentric exercises into your routine. Start by hiking local trails with a pack loaded to 10-15% of your body weight and gradually increase it. The goal is to condition your entire musculoskeletal system—your feet, knees, hips, and core—to the unique strain of carrying a load over uneven terrain. Your pack on the trail should be a familiar weight, not a shocking new burden.
The most effective way to prepare for the downhill is to train for it specifically. This can be done at home or a local gym with a simple, progressive protocol.
Your Action Plan: Eccentric Training Protocol for Downhill Dominance
- Phase 1 (Weeks 1-2): Foundation Building. Practice slow, controlled step-downs from a 6-inch platform or stair. Focus on a 3-second descent for each repetition. Perform 3 sets of 10-12 reps per leg.
- Phase 2 (Weeks 3-4): Adding Load. Increase the platform height to 8 inches and add a 10-pound weight vest or hold dumbbells. Maintain the slow, controlled movement.
- Phase 3 (Weeks 5-6): Multi-Directional Stability. Progress to lateral (sideways) step-downs off the platform. This engages the stabilizer muscles around your hips and knees, which are critical for preventing injury on uneven trails.
- Phase 4 (Weeks 7-8): Sport-Specific Stress. Perform the step-down exercises while wearing your backpack loaded with 15-20% of your body weight. This is the ultimate simulation of trail conditions.
- Phase 5 (Ongoing): Field Practice. Find local hills or a stadium with stairs and practice 30-45 minute sessions of continuous downhill walking. This integrates the strength you’ve built into a real-world movement pattern.
Don’t let the descent be your undoing. Train for the entire mountain, not just the climb up.
Why You Need Wool, Not Cotton, for a Trip to Sable Island?
There is a saying among experienced outdoorspeople: “Cotton kills.” Nowhere is this truer than in the damp, windy, and unpredictable maritime climates of Canada, from the coast of British Columbia to islands like Sable Island off Nova Scotia. Cotton is a hydrophilic fibre; it absorbs and holds onto water. When wet, it loses all of its insulating properties and actively pulls heat away from your body, a direct path to hypothermia. In a damp environment, wearing cotton is a serious safety liability.
The superior choice is merino wool. Wool is hydrophobic at its core but can absorb a significant amount of moisture vapour within its fibre structure without feeling wet to the touch. Crucially, it retains up to 80% of its insulating value even when saturated. This means a damp wool base layer will continue to keep you warm. It also wicks moisture away from your skin, is naturally antimicrobial (resisting odour build-up on long trips), and is more durable in harsh conditions. Modern merino wool is soft, comfortable, and the cornerstone of any effective layering system for the Canadian outdoors.
Case Study: Merino Wool’s Performance in Maritime Canada
In coastal environments like the Fundy Footpath, it’s far better to have a couple of thinner wool clothing items that you can layer for warmth, rather than bringing a different item for each possible weather scenario. Field tests in these conditions showed that merino base layers maintained their insulation even when damp from constant sea spray and fog, while cotton garments became a dangerous thermal liability within just a few hours of exposure.
The performance difference between these two materials in the exact conditions you’ll face on Sable Island or the West Coast Trail is not subtle—it is a matter of safety and survival. A side-by-side comparison makes the choice obvious.
| Property | Merino Wool | Cotton |
|---|---|---|
| Insulation When Wet | Retains 80% warmth | Loses all insulation |
| Drying Time (Maritime) | 4-6 hours | 12-24 hours |
| Salt/Sand Resistance | Lanolin protects fibers | Degrades rapidly |
| Odor Control | Natural antimicrobial | Harbors bacteria |
| Weight When Saturated | 30% increase | 90% increase |
Leave the cotton at home. Your clothing is not fashion; it is life-support equipment. Choose the material that is engineered to perform when you need it most.
Key Takeaways
- Adopt “Terrain-Dictated Logic”: Let the specific challenges of the Canadian environment—not a generic gear list—drive your planning.
- Build Redundant Systems: Your most critical gear (navigation, water, shelter) should have non-electronic, field-tested backups.
- Train for the Descent: Your fitness plan must include eccentric exercises and weighted pack training to prepare for the most damaging part of the hike.
How to Photograph Moose in Algonquin Park Without Endangering Yourself?
Observing a moose in the wild is a quintessential Canadian experience, but it comes with serious responsibilities. These are not docile, Disney-like creatures; they are powerful, unpredictable wild animals that can weigh over 500 kilograms. An encounter that seems peaceful can turn dangerous in an instant if the animal feels threatened. The golden rule of wildlife photography is to cause no change in the animal’s behaviour. If the moose stops eating, raises its head to stare at you, or lays its ears back, you are too close.
Most dangerous encounters happen along the Highway 60 corridor in Algonquin Park, where people stop their cars abruptly and approach moose feeding in the roadside ditches. This is incredibly risky for you, the animal, and other drivers. The key to safe viewing is to maintain a significant distance and use a telephoto lens (a minimum of 200mm is recommended). Never, ever get between a mother and her calf. A cow moose is fiercely protective and will not hesitate to charge if she perceives a threat to her young. Be especially cautious during the September-October rut period, when bull moose have high testosterone levels and can be particularly aggressive.
Safe and ethical wildlife photography requires a clear, disciplined protocol. It’s about respecting the animal’s space and prioritizing its well-being over getting the perfect shot.
Safe Moose Photography Protocol for Algonquin’s Highway 60 Corridor:
- Vehicle Safety First: If you spot a moose, pull your vehicle completely off the pavement onto the shoulder. Use your hazard lights and never stop in a live lane or on a curve.
- The Distance Rule: Your presence should be unnoticed. If the moose changes its behaviour in any way (stops feeding, looks at you, moves away), you are too close. Back away slowly.
- Use Your Lens, Not Your Feet: A telephoto lens of at least 200mm is essential. This allows you to capture a detailed shot from a safe and respectful distance.
- Always Have an Escape Route: Before you even raise your camera, identify a clear path to safety. This could be your vehicle or a large tree you can get behind.
- Never Approach Calves: This is a hard and fast rule. A mother moose is arguably the most dangerous animal in the park when her calf is nearby.
- Be Aware at Dawn and Dusk: While these are the best times for photography, they are also when moose are most active. Be extra vigilant and give them an even wider berth.
By following these rules, you can enjoy a profound moment of connection with one of Canada’s most iconic animals without putting yourself or the moose in danger. Your ultimate goal is to leave the wilderness and its inhabitants exactly as you found them.